Say what you will about the concept of home staging and the phenomenon of changing a home through styling and interior design. But there’s one thing you can't take away from the real estate industry. The ability to show a property from its best angles, quickly and efficiently.
Now you can use real estate stylists’ professional tricks to prepare your property for a photo shoot or viewing to potential tenants. Here are a few simple tricks that will give your property a visual boost.
Basic principles
Have a clear out
To ensure all focus is on the property, one simple basic trick is to tidy up and clear away as much as possible. Use this as an opportunity to tidy away everything that hasn’t been used for a while. This includes the things you can see, but also things hidden in wardrobes, cupboards, storage rooms and kitchen pantries.
Anonymise
Make it easier for a new owner or tenant to imagine themselves living in your home by removing the most obvious signs of you.
Private: To-do lists, children’s drawings, pregnancy photos, wedding photos, portraits
Personal: Musical instruments, cookbooks, perfume bottles, collections
Maximise
The goal of home styling for property listing photography is not to document everything in the property, but to highlight its most beautiful and relevant selling points. Think about what you want potential tenants to focus on in each room and then use home styling to enhance it. Have your sales pitch ready before you begin. Is it the view, spaciousness, natural light, fireplace, impressive ceiling height or something else you think is unique about your particular property? Direct all of the attention where you want it to go.
Spring clean
All properties benefit from a thorough spring clean every now and then, but perhaps none more than those that will be examined and scrutinised with a fine-tooth comb. Whether you get help from a professional cleaning company or do the job yourself, your property should be squeaky clean for both the photo shoot and the property viewing. Wiping down and polishing all surfaces is, however, more important than vacuuming (most visible in photographs) if you have to prioritise. Make sure everything is spotless and shiny, and there are no visible signs of rubbish, dirt or dust bunnies on the floor or in corners. Before viewings, however, it is important that you vacuum thoroughly. And that you also remove anything that although not visible might emit an unwanted odour, such as perfume bottles, strongly scented candles, meals or food preparation, pets and pet food, nappies, sewage, kitchen waste, etc. Give the entire place a good airing, and clean and flush out all drains.
Checklist room by room
The hallway
First impressions count and the hallway is the first thing potential tenants will see. At least when they come to the property viewing. The aim is to make the hallway feel welcoming, airy and spacious. Regardless of its actual size.
- Tidy away all shoes and coats. Leave a few carefully chosen items out, making sure they are clean and undamaged.
- Empty the coat rack and put all your gloves, scarves, woolly hats and baseball caps into a drawer or cupboard.
- Wipe down all shiny surfaces, e.g. inside the front door, sideboards, worktops, wardrobe doors, etc.
- Polish mirrors and glass doors.
- Polish fixtures and fittings, latches, levers and door knobs
- Make sure all the lights work, have been cleaned and emit a nice light.
- If possible, consider hanging a large mirror in the hallway. Mirrors make a room feel bigger and can direct more light into a cramped hallway when placed next to or opposite a window or natural light source.
- Do you have a doormat? Dust and clean it. If not, make sure you get one before the property viewing and photo shoot. Preferably one in a neutral colour or the same tone as the floor, so the doormat doesn’t distract from the first impression too much.
- Place a vase of cut flowers or a fresh-looking green houseplant on your hall table. If you don’t have a hall table, perhaps there’s room for an indoor wall planter?
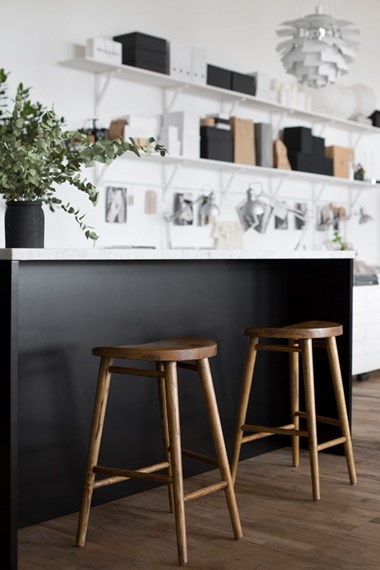
The kitchen
A welcoming kitchen should feel clean, fresh and inviting. Both in reality and in photographs. The camera never lies. Particularly about everyday things we tend to turn a blind eye to. Take a few test photos with your smartphone before taking the final photographs. That will help you see anything you might have missed.
- Remove washing-up liquid and dishcloths from the kitchen counter. Avoid eye-catching packaging in bright colours. Decant the washing-up liquid into a neutral soap dispenser (an old soap dispenser without a label) and replace the washing-up brush with a new one in a neutral colour.
- Remove all tea towels, aprons, dishcloths, used kitchen rolls, etc. before the property viewing and photo shoot.
- Tidy away any loose objects from the kitchen counter and create intentionally styled groups of specific items in the kitchen.
- Remove any fridge magnets and notes from the fridge door.
- Polish everything that can be polished. The sink, tap, temperature mixer, oven hob, appliances, chromed chair legs, lampshades, fixtures and fittings.
- Clean and refresh surface treatments (e.g. oil or wax) for any wooden parts that need maintenance (e.g. wooden countertops, wooden elements and chopping boards).
- Clean the cooker/hob, oven and oven door.
- Wash all crockery, glasses and cutlery and empty the dishwasher and draining board. Wash all pots, pans and utensils that will be visible.
- Make the dining table as small as possible, it will make the room feel bigger. Don’t be tempted to fold out any extra inserts and set the table for lots of guests.
- Check all potted plants on the window sills and make sure they’re green and fresh-looking.
The bathroom
Bathrooms are usually quite "harsh" rooms, with their standard composition of tiles, porcelain sinks, mirrors and water-repellent cabinet doors. To balance this out, you might want to use styling "softeners" such as bathroom fabrics (carpets, towels, shower curtains, etc.), greenery (potted plants, cut flowers in a small vase, etc.), wooden elements (footstools, bath brushes, over-bath trays, towel racks, etc.) and eye-catching groups of pretty items (perfume bottles, creams, jewellery, etc.).
- Wipe down all shiny surfaces, like the bathroom cabinet, toilet seat, bathtub, etc.
- Clean the grouting and tile joints thoroughly.
- Tidy away all loose paraphernalia. Toilet brush, toothbrushes, toothpaste, shampoo bottles, razors, hairbrushes and anything else that’s lying around. Put them all in storage boxes in a closed cupboard instead. Don’t have any cupboards? Buy a few storage boxes with lids that you can leave out.
- Replace your hand towels and bath towels with a matching set of fresh, clean fluffy new ones.
- Clean all of the lights and lamps, and make sure they have strong light bulbs in them so the lighting is good.
- If possible, hang a large mirror in the bathroom. A large mirror makes the room feel bigger.
- Do you have a bathroom mat? If not, make sure you get one. There are wooden and fabric ones. Choose a design that suits your bathroom and style. If you have one that is used
- can it be washed? Then wash it. If it’s looking a bit shabby, replace it with a new one.
- Add a green plant or a small cut flower in a vase.
- Buy a nice soap dispenser to place next to the tap/on the sink
- Is your laundry basket big and bulky? Replace it with a smaller one or remove it completely for the photo shoot.
- If the laundry basket must remain in place for the property viewing, empty it and wash all of your clothes to eliminate the possibility of unwanted smells or a feeling of disorder.
- Polish mirrors and shower doors.
- Make sure all fixtures and fittings, levers, taps, shower controls, shower hose, hooks. etc are sparkling.
- Final check! Remove the shower curtain so it doesn’t block any light or visibility and make sure the toilet lid is down!
Tip! Is there any discoloured, ugly grouting in your bathroom? Using a grout reviver pen, you can quickly and easily freshen up old grouting and joints in the bathroom and on shower walls. Find a pen with anti-mould treated, water-based and non-toxic paint. Before you go over the entire bathroom, it’s a good idea to test the pen somewhere less visible, like behind the bath. Just to make sure it’s the right colour or the tone you were looking for.
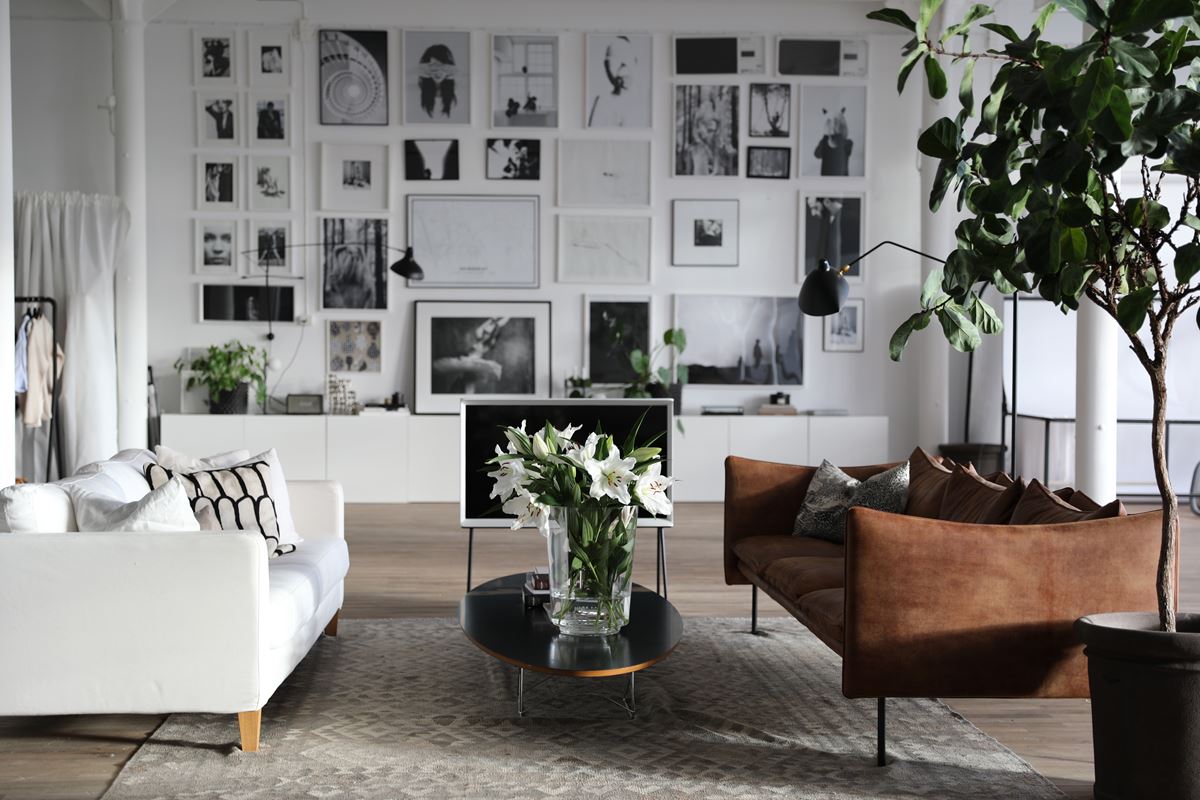
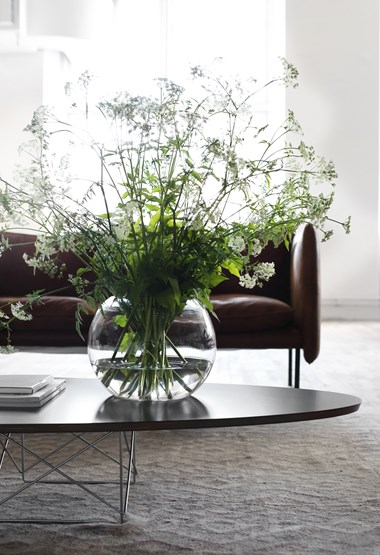
The living room
The living room is usually the biggest room in the property, and requires particular care when styling to ensure that is clear. Avoid over-furnishing the living room for a photo shoot or styling session. Tidy up and remove any bulky furniture that gets in the way, and then angle the remaining furniture so the room feels welcoming when you enter it. Look for potential camera angles in the room.
- Thin out your furniture. Not everything that’s in the room now has to be in the photograph. Any bulky furniture or items that might affect the photographs can be temporarily moved into another room. Free up floor space and group ornaments and objects together, rather than spreading them out on sideboards and bookcases.
- Inspect your sofa upholstery. Can it be washed? If so, give it a wash before the photo shoot. One trick is to not let the upholstery fabric dry out completely before putting it back on your sofa. This should straighten out any wrinkles, as upholstery fabrics usually smoothen better when on the actual furniture. Is the upholstery fabric very loud or conspicuous? Or is it so badly stained or worn that it needs replacing?
- Fluff up and rearrange the sofa cushions so they are nice and tidy.
- Tidy away all remote controls.
- Polish picture frames and glazing, as well as televisions and computer screens, to ensure they are free from dust and fingerprint smudges.
- Tidy away all cables and charger tangles.
- Check all potted plants on the window sills and make sure they’re green and fresh-looking.
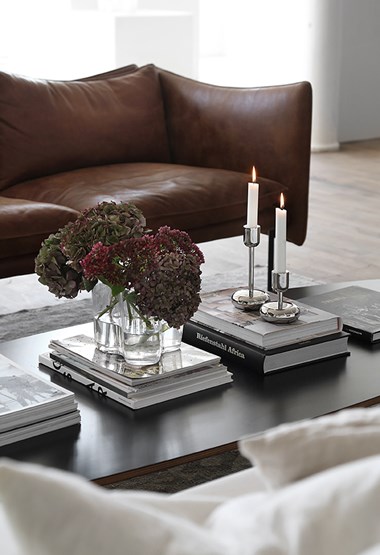
- Make sure there are candles/tealights in all candlesticks, lanterns and candle holders.
- Prepare the fireplace with firewood and top up any firewood storage/baskets with beautiful birchwood.
- Final check? Pull all blinds up as far as they will go and draw the curtains back to outside the window panes for maximum use of all available natural light.
The bedroom
- Put fresh, clean bedding on all beds. Smooth out any visible creases.
- Make the beds the way they do in hotels, with angled pillows, or cover the bed entirely with a large bedspread.
- Does the bed have a headboard? If not, get one. A bedroom always looks less cosy without a distinct headboard. You can create a makeshift headboard for a double bed from a standard 90 cm mattress overlay. Cover it with a single colour linen duvet cover, taking care to fold away the edges, and then lean it against the wall at the top of the double bed.
Tidy away all loose items from the bedside tables. Group together a few items, like a plant, a book and a glass or a bowl for jewellery.
- Tidy out your wardrobes and invest in matching hangers. Only half-fill shelves and hanging spaces, so the wardrobes feel more roomy.
- Check all potted plants on the window sills and make sure they’re green and fresh-looking.
Outdoor areas
- Sweep the balcony floor or wooden decking to remove any dirt or leaves.
- Set up an outdoor furniture group, if there’s enough room, regardless of season.
- Do you live in a house? Mow the lawn and rake thoroughly.
- Sweep (or rake) the driveway and entrance pathways.
- Weed the flowerbeds and throw dead plants, twigs and branches onto the compost heap.
- Remove ladders, bikes and bulky items from the carport.
- Clean light fixtures and lighting.
- Wipe down and freshen up all outdoor furniture.
- Do not park your car in the driveway or near the house during the photo shoot or property viewings.
- Final check! Sweep away leaves and place a fresh-looking potted plant by the front door.
Tip! Borrow or hire a pressure washer to clean tiles that are covered in dirt and moss. It can make old flagstones look brand new in less than an hour!
Before a photo shoot - The tricks that make your property more photogenic
Let the daylight in
Remove anything that prevents natural light from flowing into your property. Start outside and work inwards. Roll back garden privacy screens, relocate large plants that are blocking the light, prune invasive bushes and look for ways to maximise the flow of daylight into the property by styling the window sills and curtains to let in more natural light.
Iron all fabrics
Do not make the mistake of putting new bedding on the beds without first ironing out the packaging creases. The same goes for bedspreads, bath towels, hand towels, etc. Go through this one room at a time.
Angle the furniture
In the same way that fashion models learn to pose for the camera, home styling experts learn how to rotate and pose furniture for a photoshoot. Avoid having the back of furniture towards the camera, instead angle them slightly so you can see the seats. Pull dining chairs out ever so slightly, don’t have them squashed up against the table. Angle lamps and lampshades so they look good in the photographs, rather than for functionality, just while you’re taking the photos.
Disconnect cables
You never see visible cables in interior design magazines and there’s a reason for that. Cables create distracting lines. Remove all visible cables from behind the television and any other electrical equipment that doesn’t have to be plugged in during the photo shoot. If you have time or if you’re planning to live in the property after the styling session, consider installing cable strips and cord clips to keep everything in order.
Frida’s best photography tips
- Choose one hero for each picture
My first and most important piece of advice when it comes to photographing homes and interiors is to be careful about the angle you choose - based on how much of the room you want to show and where you want the viewer’s eyes to land. It’s usually easier to work that out when photographing people, but if you’re taking a picture of a room you have to choose a hero for your photo and decide where in the photo you want it to be. Is your main character a chair, a painting or a lamp? Choose an angle around that item and create an interesting composition that highlights what you want to show.
- Work with leading lines
I work with leading lines in photographs a lot, both when I’m styling and when I’m photographing interiors. What does that mean, exactly? They are lines that draw the eye into the photograph and focus on the “hero” you’ve chosen. Use carpets and skirting boards or a line in the sofa, a table or some other angle that enhances the feeling of depth and leads the viewer’s eyes to the item you want them to focus on.
- Photograph from a low viewpoint
The most common mistake when photographing interiors is selecting the wrong height for the camera/tripod. Browse through in an interior design magazine and you’ll see how the photographers usually take pictures from waist height.
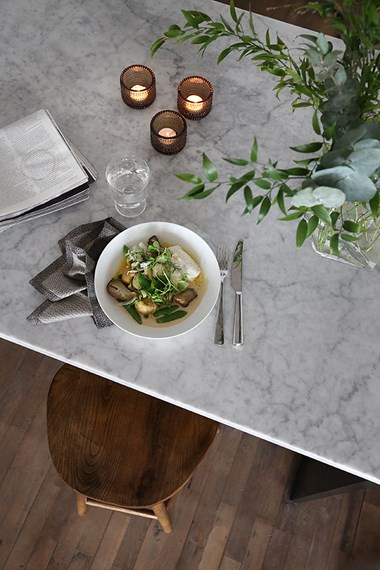
- Create depth with something in the foreground
The vast majority of photographs are considered more exciting and less “flat” if they have an element of depth. Try photographing an item by putting it into perspective. Show a glimpse of something in the foreground, or photograph it through some foliage, or let a curtain flutter in the foreground.
- Daylight, fake lighting and flash photography
Very few interior design photographers use a flash. Instead, they use natural light and a high exposure setting to make the picture as bright as possible. They also switch off all artificial lighting to prevent what is known as mixed lighting (unnatural red, yellow or blue light emanating from the light source). If you have a hopelessly dark room and you absolutely must use a flash - use one that you can rotate and angle it up towards the ceiling.